Key Indicators of a Perfect Weld Bead in Professional Fabrication
A perfect weld in professional work shows exact shape, strong bonding, and steady metal traits. It is not just a neat surface. Spotting these signs lets engineers and inspectors make sure of safety, long life, and structural strength on the job.
Visual Weld Quality Indicators: Uniform Bead Width and Smooth Ripple Pattern
The first check is how the weld looks. A work-grade weld has a steady bead width, even ripples, and smooth ends with a clean toe line.
- Uneven bead width often means unsteady travel speed or voltage changes.
- Too much spatter or dark color usually shows poor shielding or dirty surfaces. A clean, even finish also cuts stress spots. This matters for welded parts in racking and carport frames where fatigue strength counts.
Proper Weld Penetration and Fusion Depth Signs
Good penetration means the weld reaches the bonding level set by design. For complete joint penetration (CJP), bonding must go through the full thickness. For partial joint penetration (PJP), it follows the drawings and code. Knowing CJP vs PJP early sets the right testing and approval path later.
Consistent Weld Profile and Edge Tie-In
A skilled weld joins the base metal with a smooth tie-in and steady profile. This flow aids load transfer. It is key for parts like C Steel Channel and Omega Steel Beam. These must handle wind and snow without hot spots.
Absence of Porosity, Cracking, and Undercut Defects
Common flaws include porosity from trapped gas, undercut from overheating or bad handling, and hot or cold cracking from metal or restraint issues. Controls to stop them include setting gas flow, dry and clean joint faces, and checking coverage. For important seams, non-destructive testing (NDT) like dye penetrant and ultrasonic testing finds issues not seen by eye.
Dimensional and Structural Weld Quality Standards for Engineering Applications
Exact sizes decide if a weld can take real loads. In work, approval follows AWS D1.1/D1.1M (Structural Welding Code—Steel) and ISO 5817 (Quality levels for imperfections). These set rules for judging reinforcement, contour, alignment, and flaws by quality levels and joint type.
Correct Bead Height and Width Ratios per Joint Design
Lap, butt, and fillet joints have different contours and reinforcement needs. Inspectors use acceptance limits from the code and quality level (like ISO 5817 levels B/C/D or AWS D1.1 clauses). This depends on material, thickness, position, and service. CZT’s H Steel Beam and Z Steel Channel are made and checked to these limits in big projects.
| Parameter to Check | How to Control in Practice | Code/Standard Anchor |
| Weld contour & reinforcement | Fit-up jigs; WPS windows for travel speed/voltage; controlled interpass | ISO 5817 quality levels; AWS D1.1 acceptance clauses |
| Alignment & joint geometry | Laser-cut prep; verified root gap; proper backing/consumables | AWS D1.1 joint details & workmanship provisions |
| Discontinuities (porosity, lack of fusion, undercut) | Visual testing plus scheduled NDT gates | ISO 5817 acceptance; ISO 17637 for VT |
Penetration Measurement in Professional Welding Inspection
Penetration is checked by procedure qualification with macrosections. In production, UT/RT is used where needed. For CJP design, full-thickness bonding is required. For PJP, approval matches drawings and code. CZT records penetration class and results in WPS/PQR for PV foundations and carport frames.
Strength and Fatigue Indicators for Load-Bearing Welds
Signs linked to fatigue include steady microstructure in the HAZ, smooth toe changes without notches, and set parameters like heat input, interpass, and filler type. Repeat work and tracking come from ISO 3834 and AWS D1.1 in buying, procedure, and welder checks, and in-process control.
Thermal Distortion and Heat-Affected Zone Control
A narrower, even HAZ shows better heat control and less distortion. Laser cutting and cold forming cut thermal load upstream. Fixturing and sequence plans stop locked stresses. This is vital when making C-type pile Foundations and solar mounting frames. Alignment affects install speed.
Process Control Parameters That Determine Perfect Weld Quality
Optimal Heat Input and Current Settings for Stable Welds
Heat input sets penetration and bead shape. Skilled welders keep amperage, voltage, and interpass temperatures in the qualified WPS. This meets AWS/ISO approval without too much or too little heat.
Travel Speed and Torch Angle Optimization Techniques
Travel angle affects penetration and spatter strongly. For GMAW/MIG in common spots, 5–15° is a good start range. Angles over 20–25° raise spatter and cut penetration. They are used with care. CZT sets these technique windows in training to keep bead look and penetration steady in high-volume jobs.
Shielding Gas Purity and Contamination Prevention
Shielding gas quality stops porosity and oxidation. This is key on stainless and galvanized steels. According to The Fabricator,welding-grade argon at 99.995% purity works for GTAW/GMAW. Shops handle hose materials, nozzle distance, and purging to keep contaminants from the arc. CZT uses sealed delivery and pre-purge steps to keep the gas good.
Pre-weld Preparation and Post-weld Cleaning Procedures
Strong bonding needs joint prep: degreased and descaled faces, exact bevels, checked root gaps, and firm fixturing. After welding, brushing, and passivation, it brings back corrosion resistance. This is for galvanized parts like Z Steel Channel in racking before hot-dip galvanizing or coating per spec.
Non-Destructive Testing (NDT) and Advanced Weld Inspection Methods
Modern checks go beyond visual. NDT confirms internal quality without harm to parts. This is needed for safety parts and code rules.
Visual and Radiographic Weld Inspection Checklist
Visual testing (VT) per ISO 17637 sets bead contour, surface signs, and work quality. Radiographic testing (RT) finds internal volume flaws like voids or inclusions in fit joint types and thicknesses. Both are planned per the ITP.
Ultrasonic and Magnetic Particle Testing for Hidden Defects
Ultrasonic testing (UT) spots subsurface flaws. Magnetic particle inspection (MPI) shows surface-breaking issues in ferromagnetic steels. Choice depends on joint shape, thickness, and access. These check welded beams and channels in solar carports and ground systems.
Tensile and Bend Testing to Verify Weld Strength
Procedure qualification uses mechanical tests like tension, bend, and sometimes impact. This confirms that the WPS gives good properties for material and service. Approval values come from the code or standard, like AWS D1.1.
ISO 3834 and AWS Standards for Professional Welding Quality
A quality system from ISO 3834 and work to AWS D1.1 gives the base for steady buying, procedure, and welder qualification, in-process watch, and final check. This delivers tracking from material certificates to NDT reports.
Common Weld Defects and How They Affect Perfect Weld Indicators
Porosity and Slag Inclusion in Metal Welds
Porosity makes stress points that cut fatigue strength. Root causes are moisture, surface dirt, and poor shielding. Where needed, UT/RT measures internal voids for approval.
Lack of Fusion and Incomplete Penetration
Lack of fusion comes from low heat input, wrong torch angle, or bad joint prep and fit-up. Laser-cut preps and checked root gaps for lower risk before welding. Approval matches the set quality level in ISO 5817 or AWS clause.
Cracking, Overheating, and Deformation
Cracking shows in cooling if the restraint is high or if hydrogen is present. Preheat, interpass control, and set cooling rates to cut risk. This is for thick members like Omega Steel Beam in frames with cyclic loads.
Best Practices to Prevent Weld Defects in Production
Professionals usually:
- Keep the heat input in the qualified window.
- Maintain clean joint faces, dry consumables, and controlled fit-up.
- Verify shielding gas coverage and purity.
- Apply continuous VT and scheduled NDT per code. These steps support high-quality production for welded structural items.
CZT — Precision Welded Components and Metal Fabrication Expertise
Company Overview: Professional Metal Fabrication and Solar Mounting Manufacturing in China
CZT specializes in precision metal fabrication and photovoltaic mounting structures, offering high-quality welded assemblies designed for global solar projects. Our Tianjin facility operates under a 6S management system and follows AWS and ISO welding standards to ensure stable, repeatable production quality.
Core Products: Structural Steel Channels and Custom Welded Parts for Solar Energy Systems
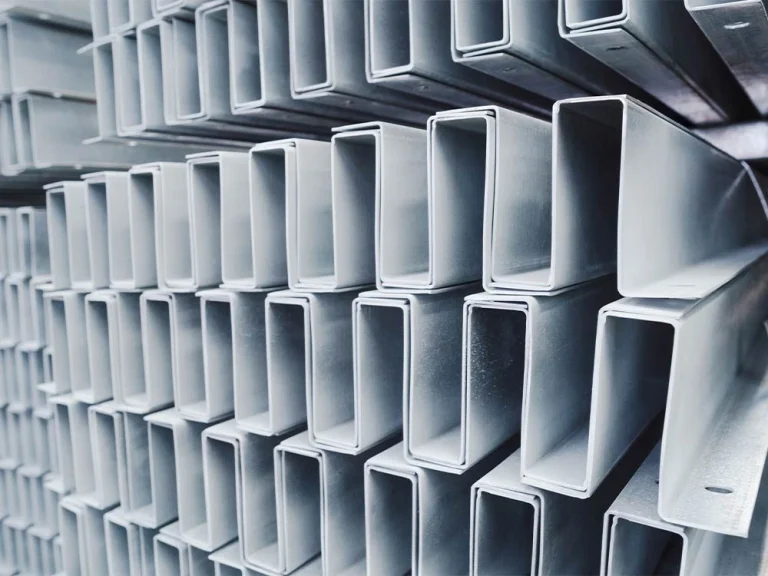
We manufacture C Steel Channel, Z Steel Channel, and Steel Welding Parts engineered for strength, accuracy, and corrosion resistance. Each product supports large-scale solar racking, carports, and ground-mounted systems, helping customers achieve reliable structural performance under diverse environmental conditions.
Production and Quality Control: Advanced Welding Processes for Long-Term Durability
CZT’s workshops integrate laser cutting, cold forming, and automated welding technologies, ensuring uniform weld penetration and consistent bead geometry. All welded joints are qualified to AWS D1.1 and ISO 5817 acceptance levels, with continuous monitoring of heat input and interpass temperature to guarantee a perfect weld every time.
Applications and Global Reliability: Welded Steel Solutions for PV Trackers and Mounting Structures
From CZT One Axis Solar Tracker to Carbon Steel Solar Panel Structures, our precision-welded components deliver outstanding load-bearing performance, long service life, and proven reliability. Each structure reflects CZT’s commitment to perfect weld quality, precision engineering, and durable solar infrastructure for global energy markets.
FAQ
Q1: What are the most reliable indicators of a perfect weld in professional work?
A: Steady bead contour, bonding that meets design class (CJP or PJP), smooth toe changes, and no bad flaws per ISO 5817/AWS D1.1. Check by VT and needed NDT.
Q2: How can professionals inspect weld quality without damaging the component?
A: Use NDT—UT for subsurface flaws, RT for internal volume issues in fit joints, and MPI for surface-breaking flaws on ferromagnetic steels. Pick by shape and access.
Q3: Which factors most influence weld strength in structural steel fabrication?
A: Controlled heat input and parameters, right joint prep, proper filler type, and shielding gas quality. Approval by the governing code and a qualified WPS/PQR.
Q4: What type of welded components are most critical in solar mounting systems?
A: Structural members like C Steel Channel, Omega Steel Beam, and Steel Welding Parts form the main support of racking and carports. Welds should meet the specified code quality level.
Q5: How do manufacturers maintain weld consistency in mass production?
A: Set WPS windows, operator training, logged parameters, and ISO 3834 quality controls, plus VT and proper NDT keep weld quality steady across thousands of parts.


